Attach action camera to motorcycle
For several years, it has been popular to attach action cameras (wearable cameras) to motorcycles. On this page, I will show the procedure of attaching an action camera to my motorcycle with images.
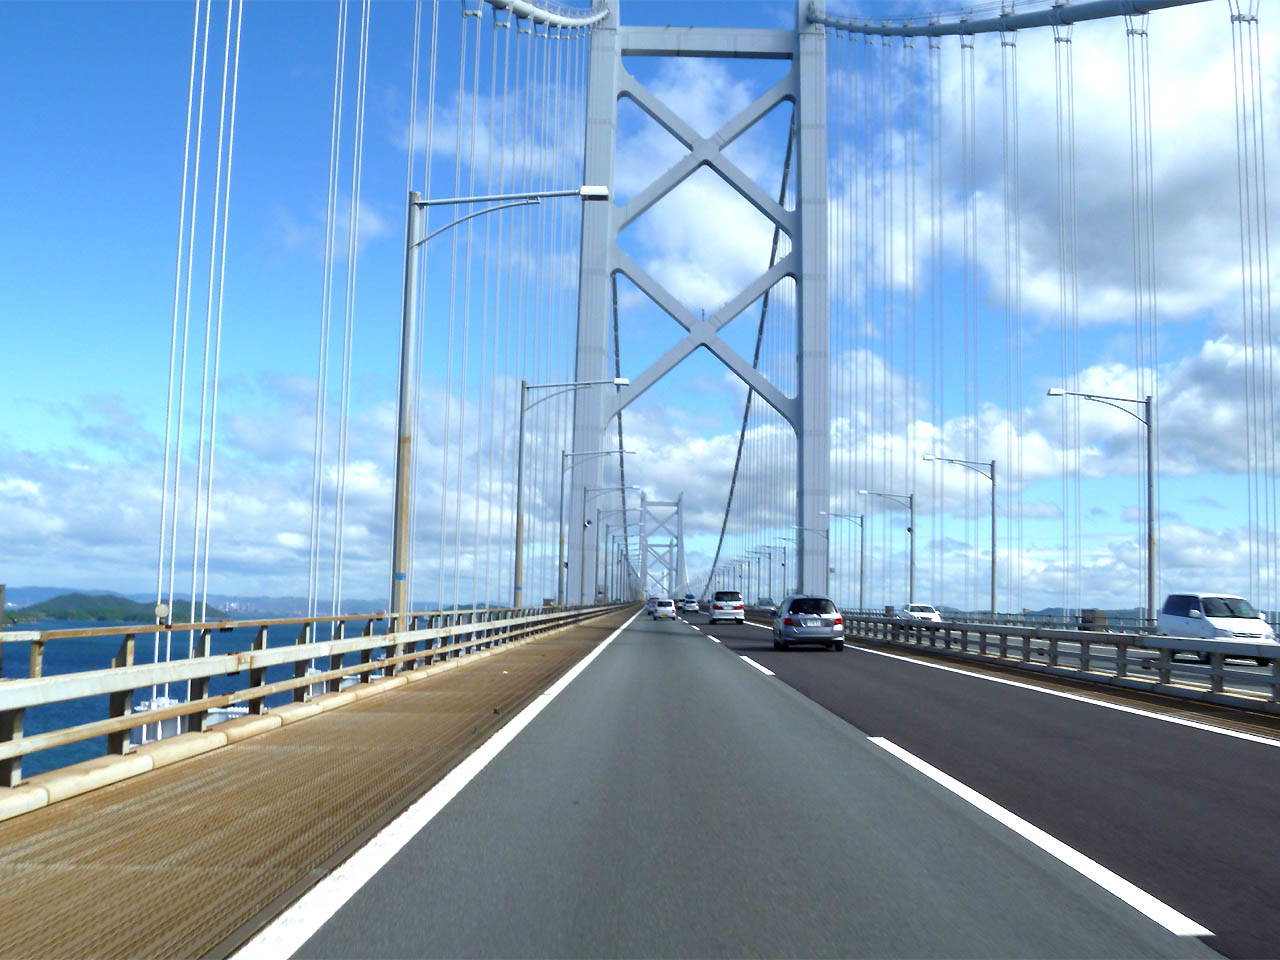
The picture on the left is a picture taken while driving on "Seto Ohashi (Great Seto Bridge)" in Japan with a general compact digital camera before the action camera became popular. For a long time, I used compact digital cameras instead of action cameras.
Mounting parts
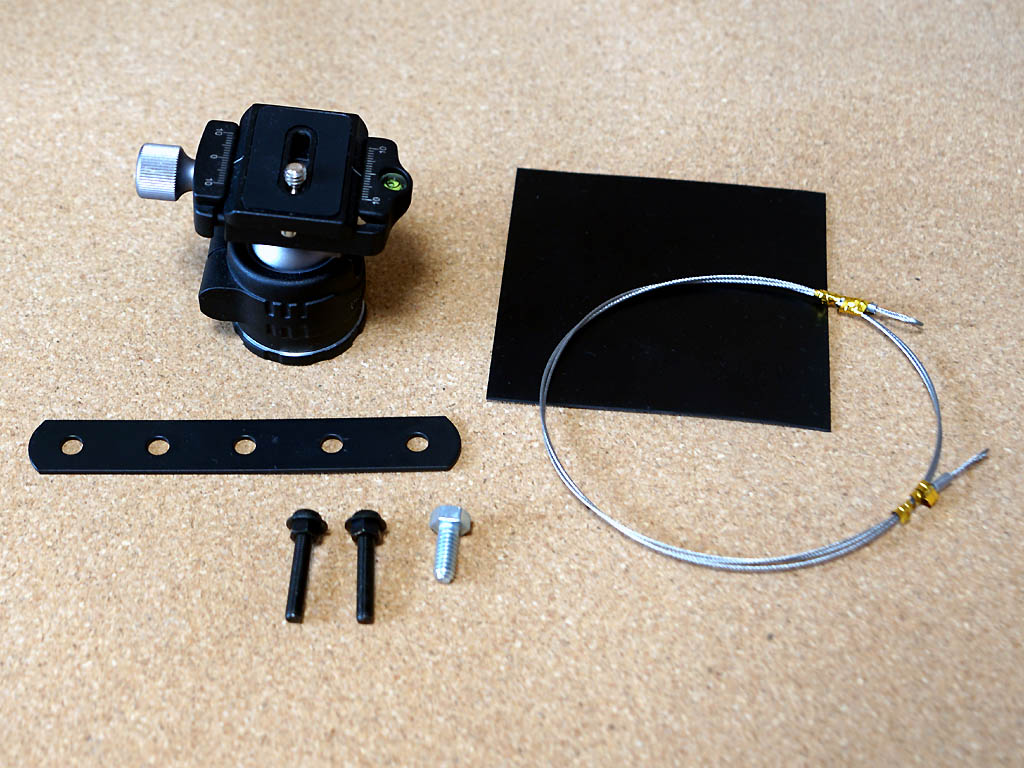
The parts for mounting the camera prepared this time are as follows.
· Camera Pan Head (¥2,999=$27.2)
· 10cm Joint Bracket (¥128=$1.2)
· Rubber Plate (¥68=$0.6)
· 30mm Iron Plated Screws 5pieces (¥148=$1.4)
· 1/4 Inch Screw (¥10=$0.1)
· 1.0mm Stainless Wire (¥88=$0.8) unused
I bought the Camera Pan Head at the amazon, and other parts at the DIY store.
Camera pan head
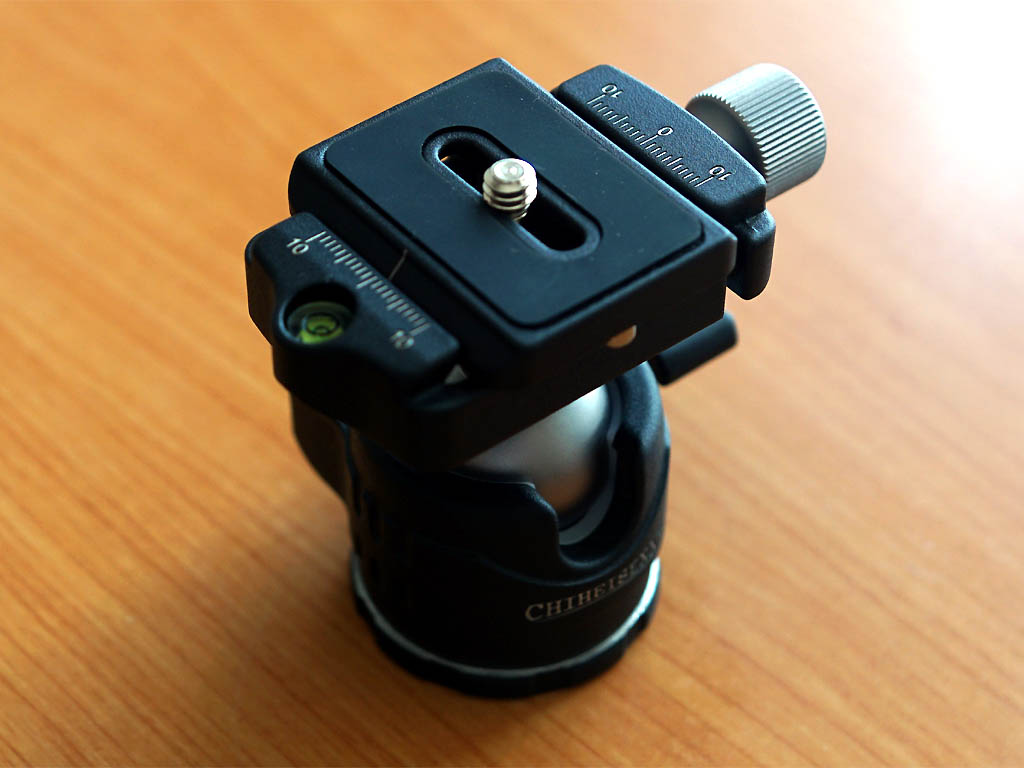
I choose a camera pan head with a low center of gravity and a light weight.

The screw hole size on the bottom of the camera pan head is 3/8 inch. It also comes with 3/8 inch and 1/4 inch conversion screws.
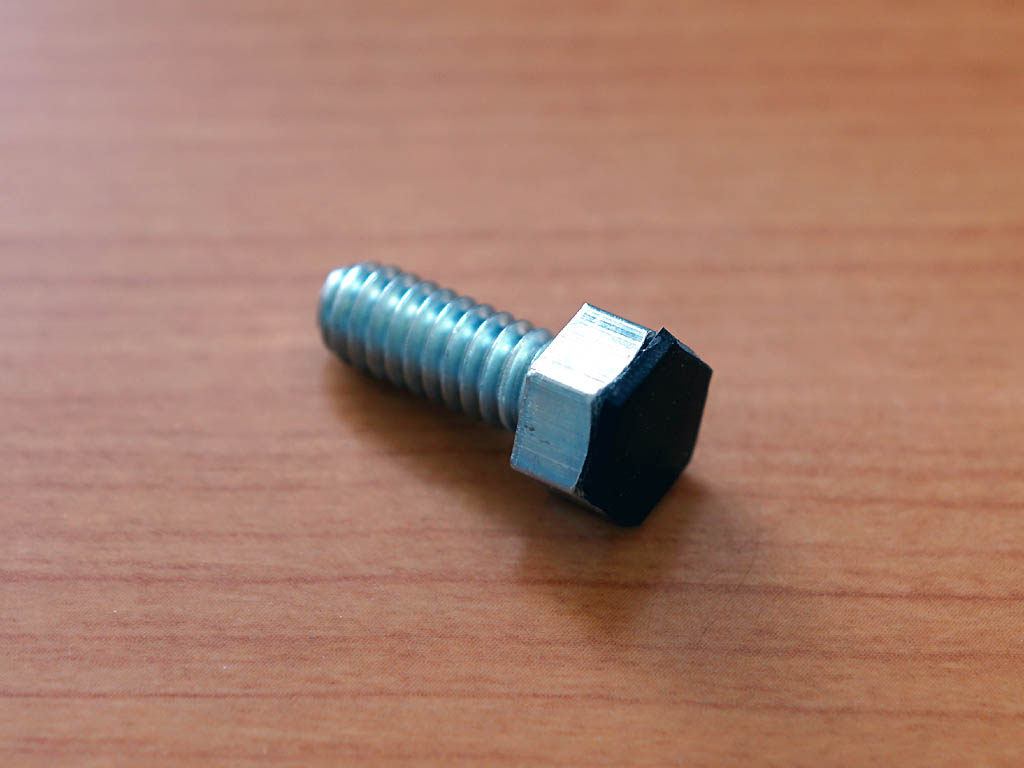
Each 1/4 inch bolt sold separately at the DIY store costs 10 yen. In Japan, JIS standard millimeter screws are commonly used, so some stores do not sell unified standard inch screws.
Since the surface of the bolt contacts the cowl of the bike, I attached a rubber plate so that it would not get scratched.
Joint Bracket
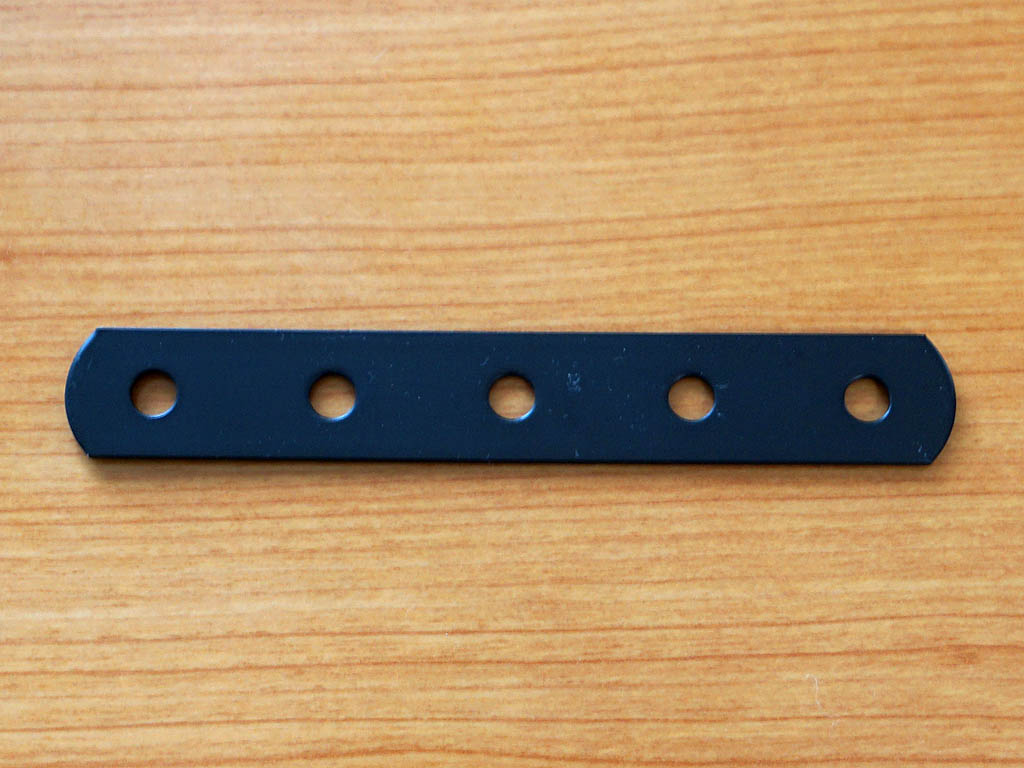
This is a joint metal fitting (10cm, 5holes, black) purchased from DIY store. This part is commonly used and is sold at any store in Japan.
The motorcycle cowl is streamlined shape. There will be a gap if you attach unprocessed joint bracket. The pitch of the 1st and 5th holes of the joint bracket is 10cm, but the pitch of the cowl fixing the motorcycle (ZZR400) screen is about 9.5cm. If you install it as it is, the screws will not fit all the way.
The joint bracket deforms when force is applied. Avoid the 1st, 3rd and 5th screw holes and deform the oint bracket.
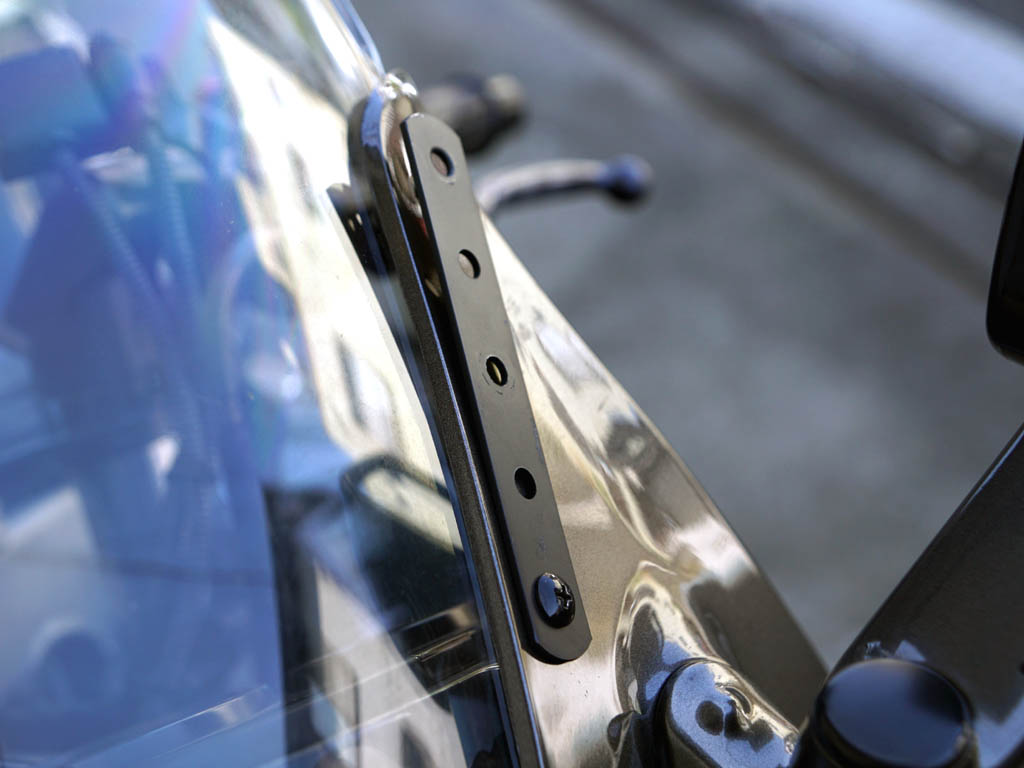
I removed two screws of the cowl which fixed the screen of motorcycle (ZZR400), and attached the processed joint bracket. Since the genuine screw is short in length, I replaced it with a 30mm iron plated screw. The height is adjusted using nuts and washers.
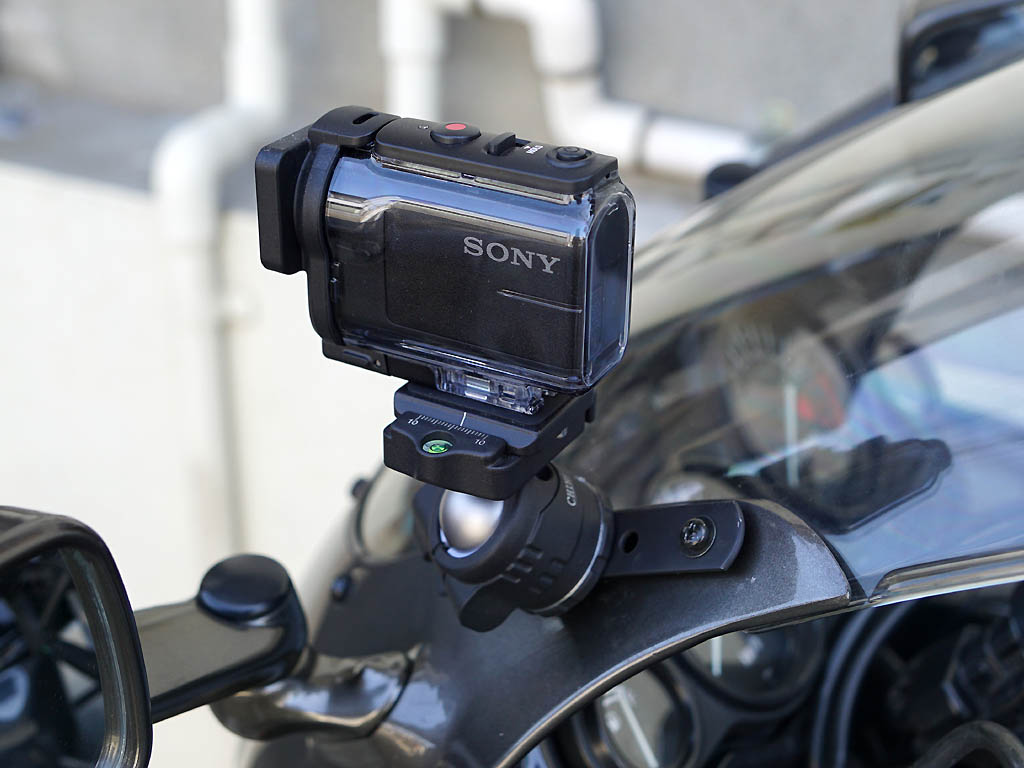
Attaching the camera pan head
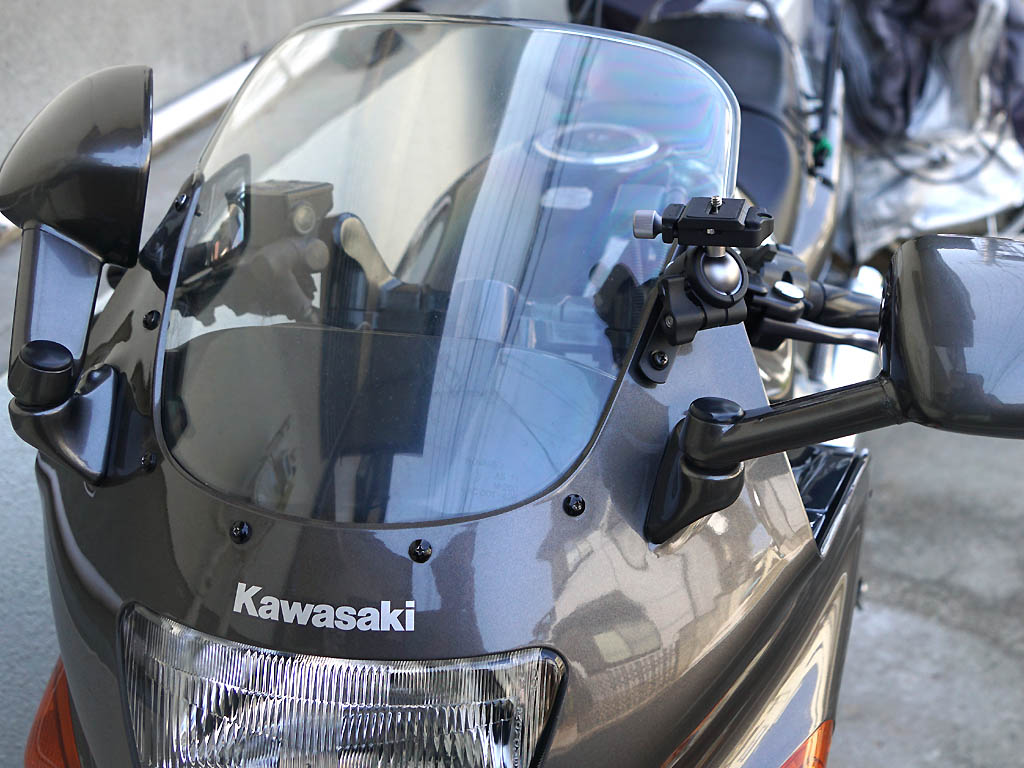
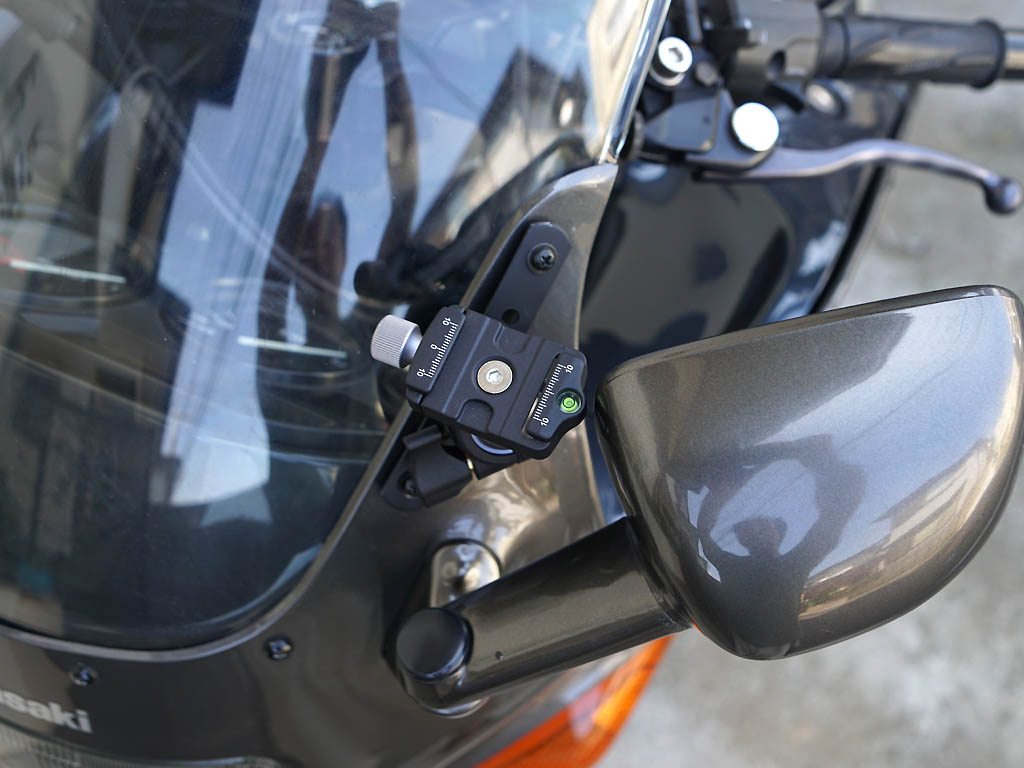
I attached the camera pan head to the joint bracket. Since it is fixed with two screws and one bolt, the joint bracket on which the action camera is mounted is sufficiently stable.
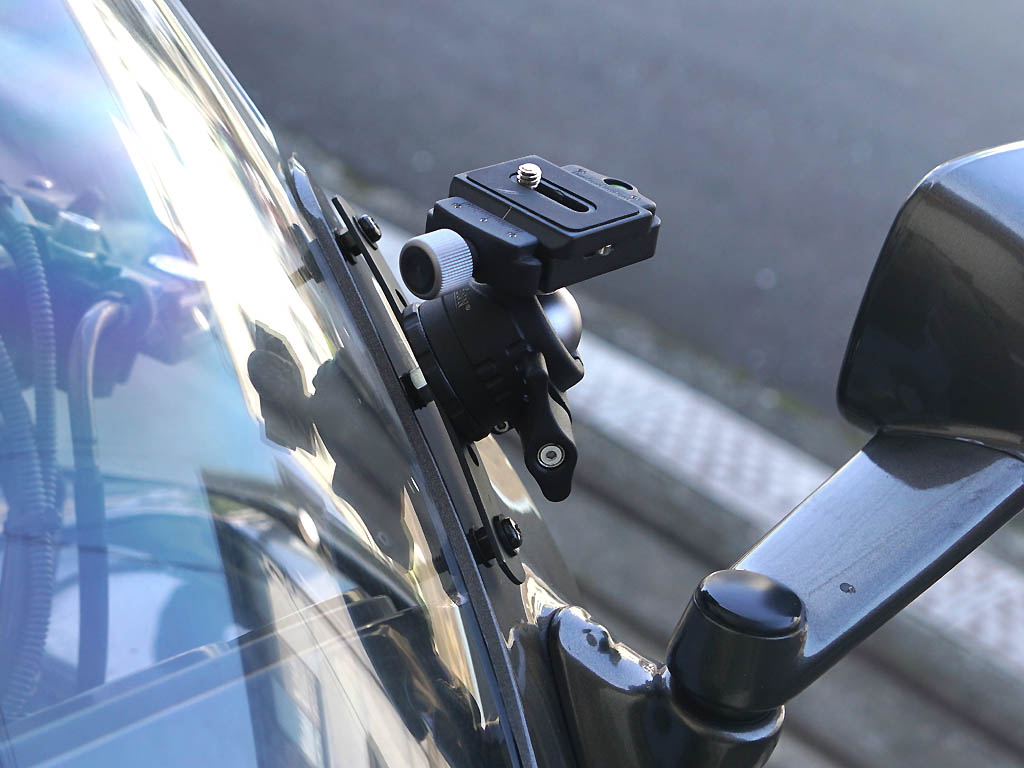
This is the image seen from the side. Due to the large bolts that hold the camera pan head, there is a gap between the motorcycle cowl and the joint bracket. However, this gap is acceptable.
If you fold the side mirror of the bike, you will hit the camera pan head. However, it is enough if you can bend this much. If you are concerned, please attach it to the screw hole one step lower.
The image on the left shows the Quick Shoe Plate removed from the camera pan head. The green part is Bubble Level.
Action camera installation
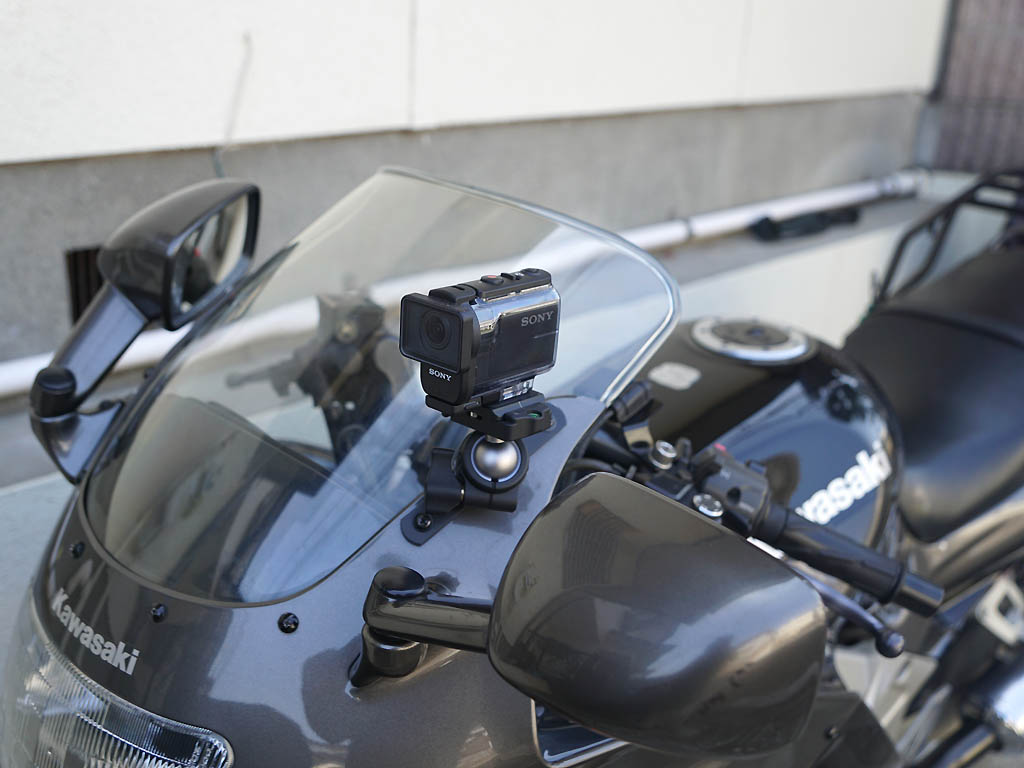
The image on the left shows a motorcycle with an action camera attached. This action camera is the cheapest HDR-AS50 made by SONY.
This is a side view of a motorcycle with an action camera attached. The mounting position of the camera is a little high, but this is not a problem. I will test the vibration of the camera when the bike runs at high speed later. This action camera has a waterproof cover to protect the lens. In this state, you cannot record enough sound while driving. Therefore, an IC recorder will be installed separately.
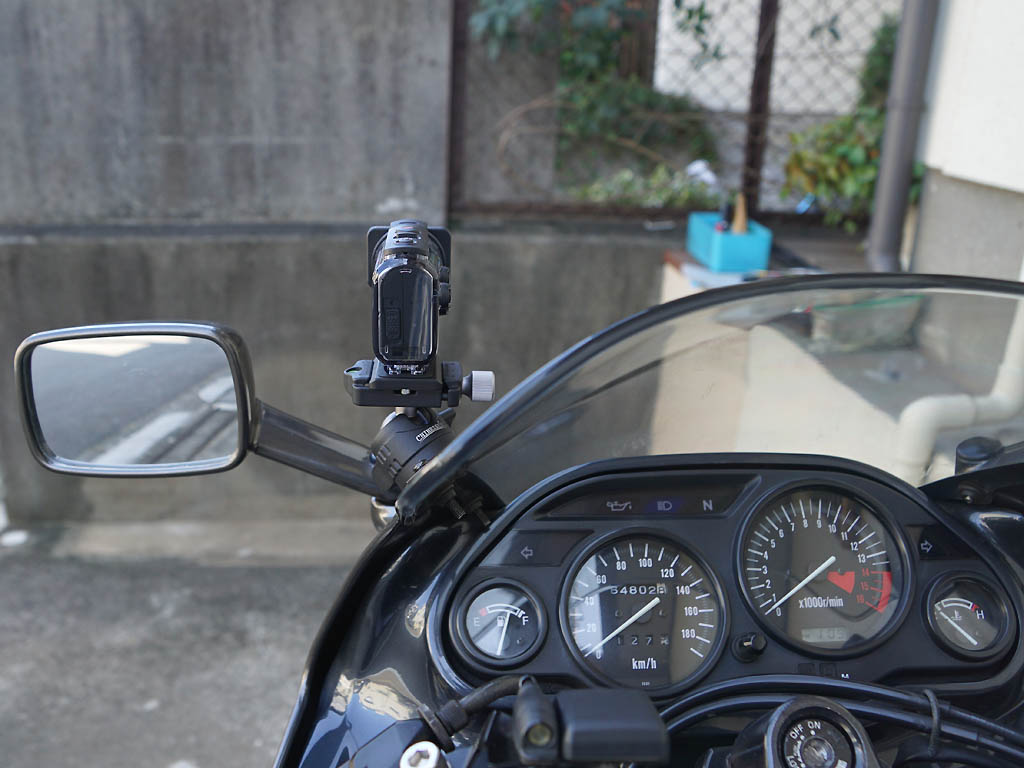
The image on the left is the camera seen from the riding position. If you install the camera in this position, it will not obstruct your view while driving. You can check the status of the action camera while riding the motorcycle.
I didn't use any wire to prevent the camera from falling because I could fix the camera well.
That's all for this report. At a later date, we will conduct a video shooting test while riding a motorcycle.
[Appendix]
As a result of the video shooting test, the camera pan head vibrates more than expected. When I looked at the action camera while driving, the action camera was swaying sideways. The HDR-AS50 made by Sony does not have the high-performance anti-shake function as high-end models, but it still reduces the blurring caused by vibration.
I am happy with the quality of the video shot with this method. If you want to shoot high quality movies, you need to change the installation position of the camera or consider a method to reduce vibration. I will change the fixing method of the action camera at a later date. I changed the fixing method of the action camera and conducted a video shooting test.
Reduce camera vibration while riding a motorcycle
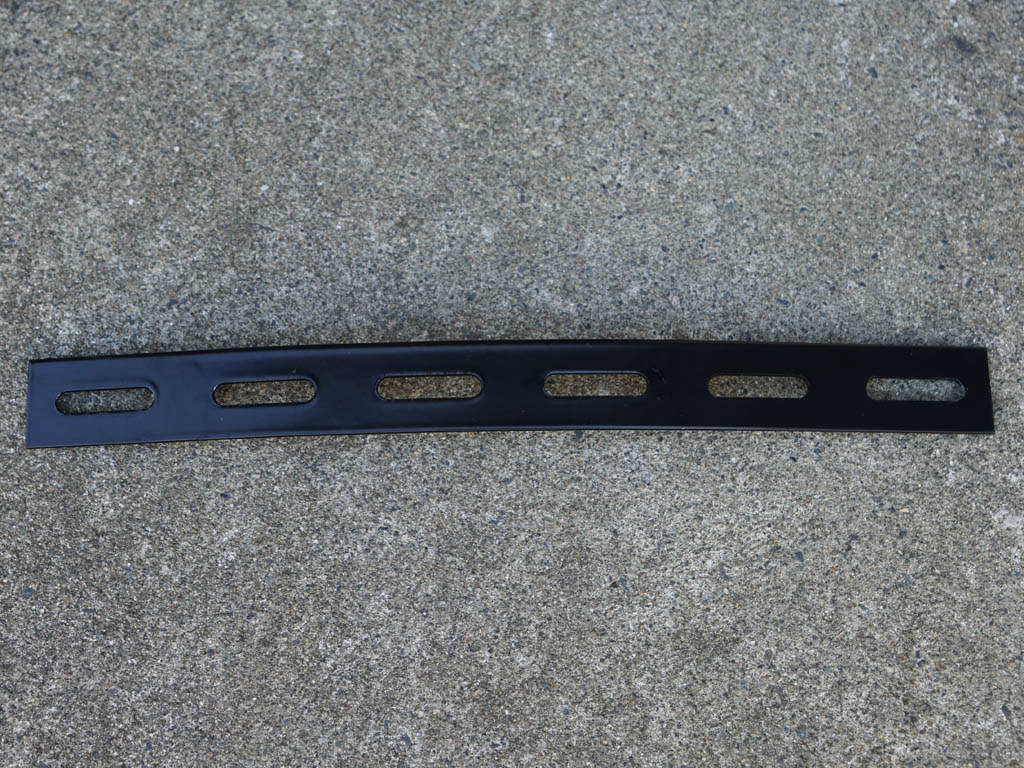
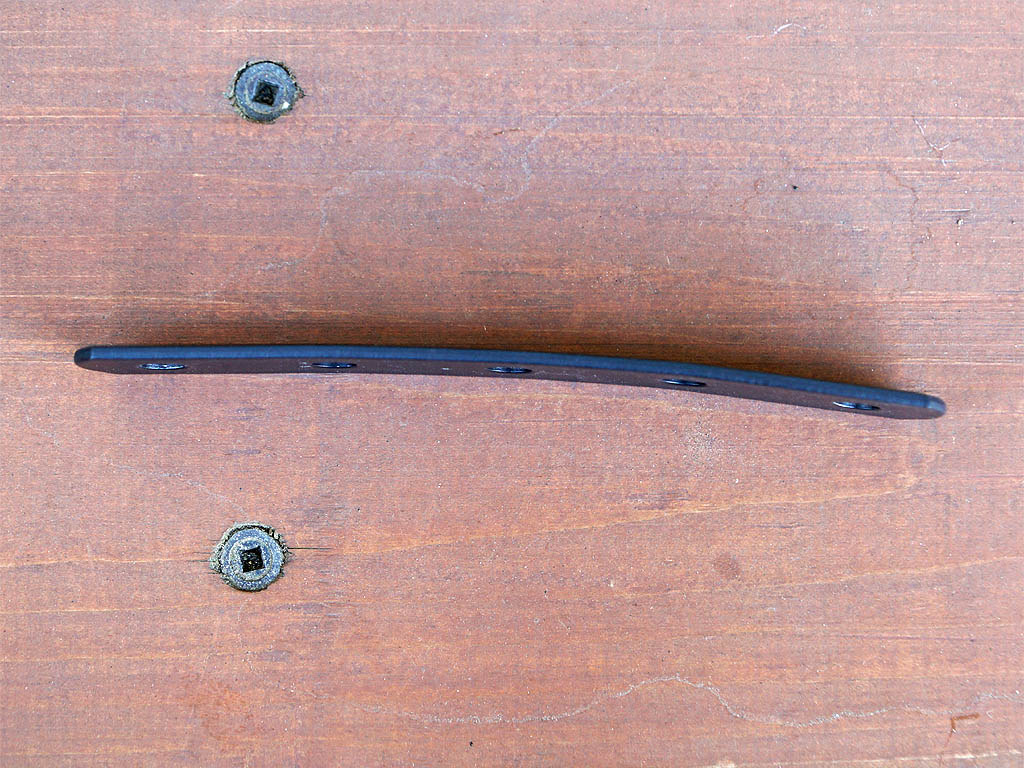
I bought a flat bar bracket (¥208=$2) at the DIY store. The image on the left is a 30cm flat bar bracket, but actually I use a 45cm flat bar bracket.
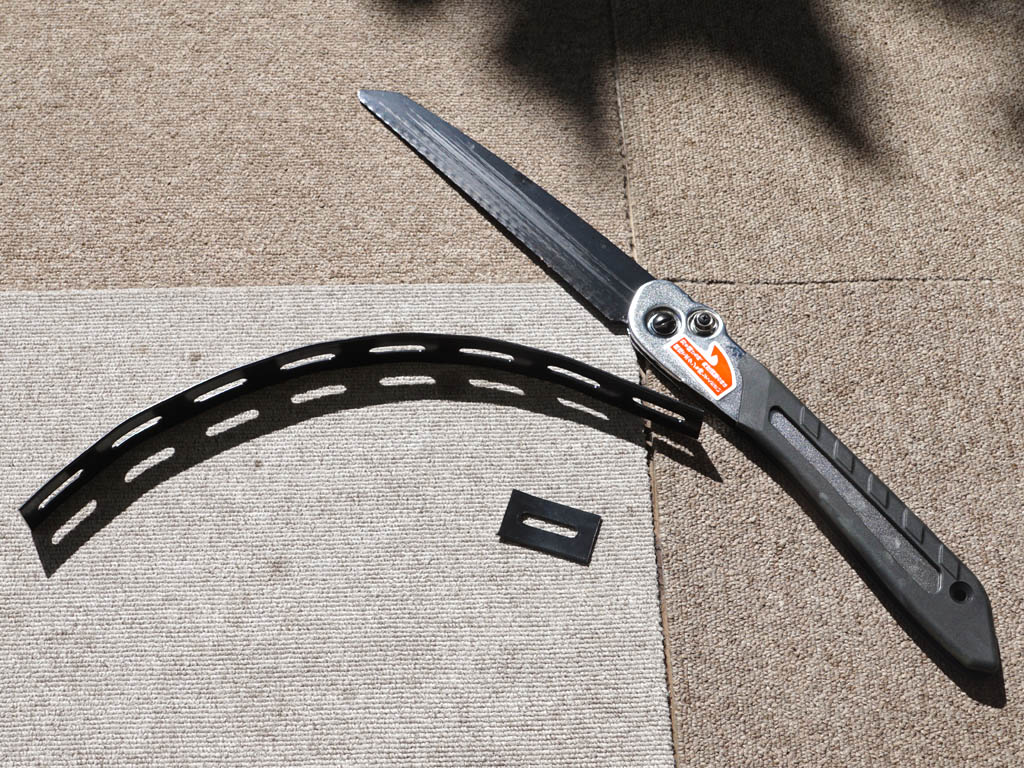
First, bend the flat bar bracket. Then cut to the same length as the motorcycle screen.
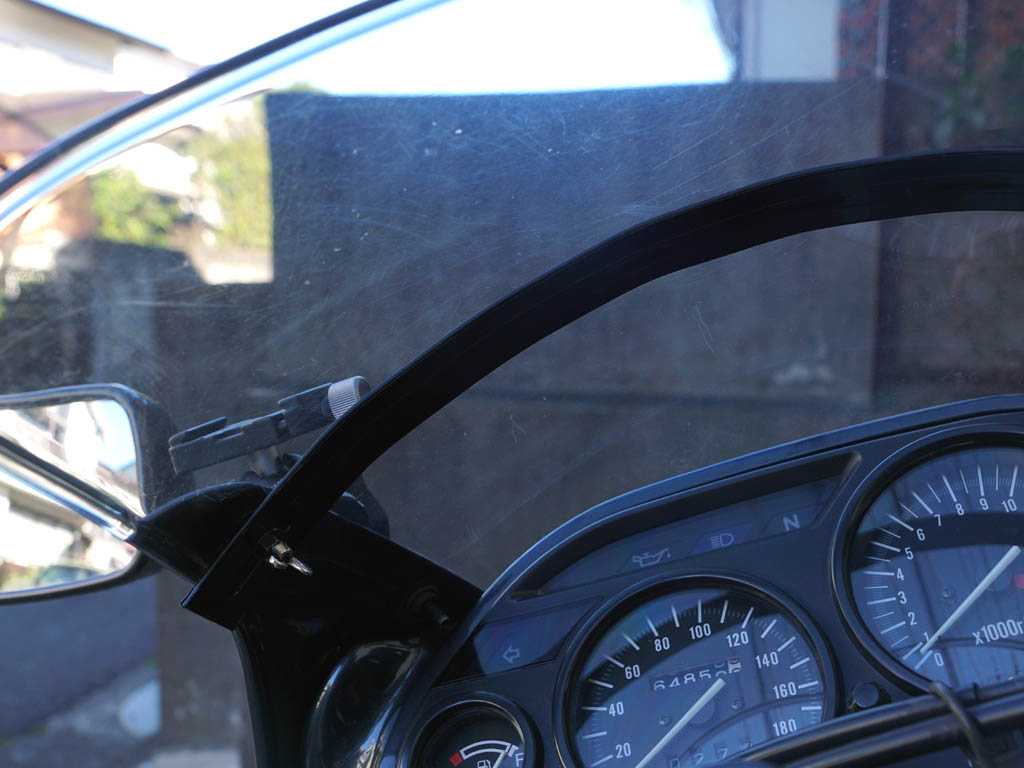
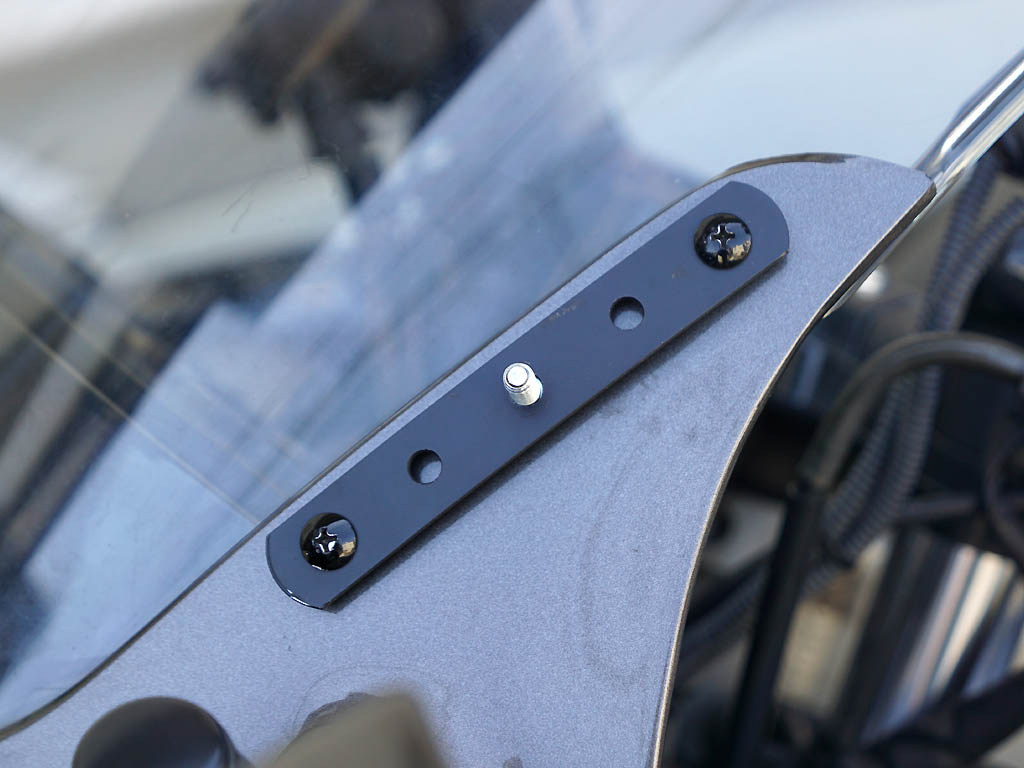
I protected the surface of the flat bar bracket with vinyl tape and then attached them to the motorcycle screen. Now it is temporarily attached. If there is no problem in the video shooting test in this state, I will coat the surface of the flat bar bracket. In the future, I plan to attach a 5V powered USB connector to this bracket.
As a result of the video shooting test, I was able to reduce the vibration of the action camera while riding the motorcycle. However, if I put the gear in neutral while the vehicle was stopped at the red light, the camera started to shake more than before. This is because by fixing the motorcycle screen, engine vibration during idling could be easily transmitted to the camera pan head. However, I think this is better because the vibration of the action camera while driving is reduced.