Motorcycle maintenance
I am an amateur in motorcycle maintenance. Still, while riding a motorcycle, I encountered various problems and I am studying little by little. On this page, I will write down what I felt as "at least this is necessary" based on my experience with troubles.
3. Chain and sprocket replacement
17. Light does not turn on (1) Valve replacement
18. Light does not turn on (2) Voltage regulator replacement
19. Engine oil leak (1) Gasket replacement
20. Engine oil leak (2) Water pump replacement
1. Oil change
Change the motorcycle engine oil regularly. The timing of oil change varies depending on the person, but it is said that the guideline is 3,000km to 5,000km. I try to exchange as much as possible before and after a long trip. You can change the oil yourself, but it is easier to change the oil at a specialty store because the waste oil treatment is troublesome.
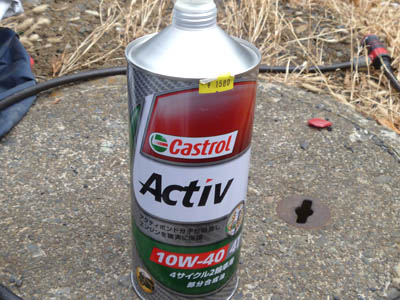
There are various types of engine oil for motorcycles. I am using "Castrol Activ 10W-40". The price is about 1,400 yen per liter. 1 liter can is easy to use. When exchanged at a specialty store, it is sold by weight.
If you do not want to change the engine oil yourself, change it at a specialty store. I often use "2 Rinkan" in Japan. Once you become a member of this shop, you will receive one year of free oil change wages.
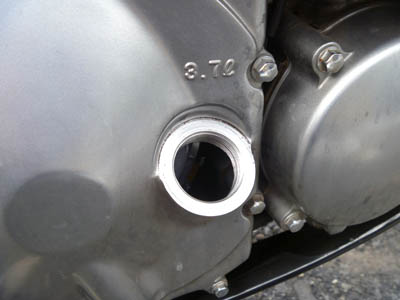
The total oil volume of the ZZR400 is 3.7 liters. If you do not change the filter, the amount of oil is about 2.8 liters. If you change the filter, the amount of oil is about 3.2 liters.
2. Chain maintenance
Even if you're not good at bike maintenance, do the chain maintenance yourself.
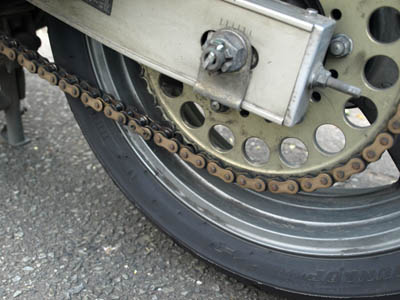
Motorcycle chains must be regularly lubricated with chain lube. The picture on the left shows a dirty chain after 10 days of running. Before the chain can reach this state, it needs to be maintained.
The picture on the left shows a motorcycle chain that has been parked outdoors for a long time and has begun to rust. The rainy season in Japan continues to rain for a long time, so be careful to rust the chain.
I use a chain maintenance set made by D.I.D. This product is a set of cleaner and lube. Of course, they are sold individually. A set product costs about 2,000 yen.
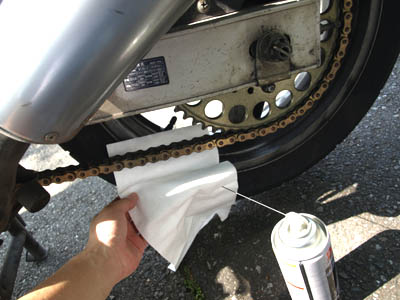
1) First, clean the chain with a cleaner.
2) Then use a waste cloth to wipe the cleaner.
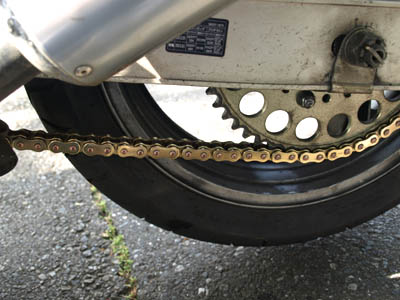
3) Spray the lube evenly on the chain.
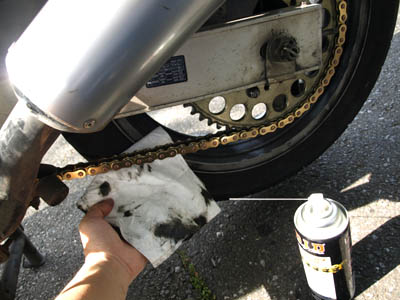
4) Finally, remove excess oil with a waste cloth to complete maintenance.
You can adjust the looseness of the chain at a specialty store. The cost is 550 yen. If it is too worn to adjust, replace the chain.
3. Chain and sprocket replacement
The worn chain must be replaced. When replacing the chain, we recommend replacing the sprockets at the same time.
The standard number of teeth on the ZZR400 sprocket is 15/52 for N type and 15/49 for K type. Standard values for each vehicle type are posted on the X.A.M website. (X.A.M)
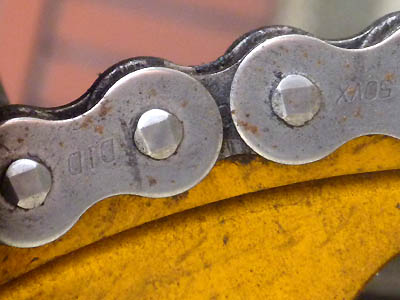
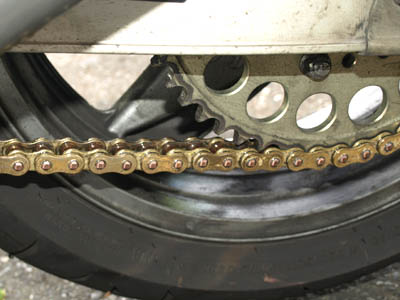
The parts shown in the photo on the left are the D.I.D chain "530ZVM-X-120ZB S&S" and the X.A.M rear sprocket "Classic A6404-52T". Although not shown in the photo, the front sprocket uses "Classic C6304-15 530-15T" made by X.A.M.
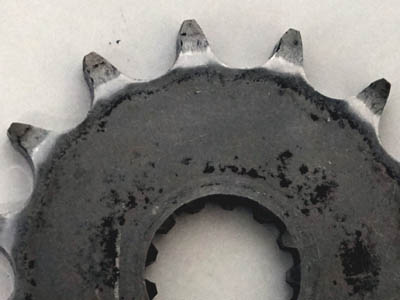
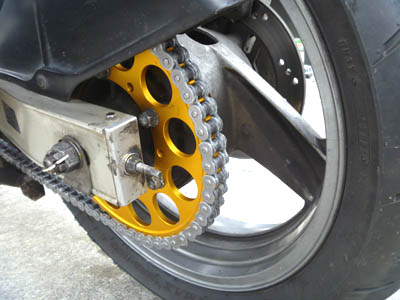
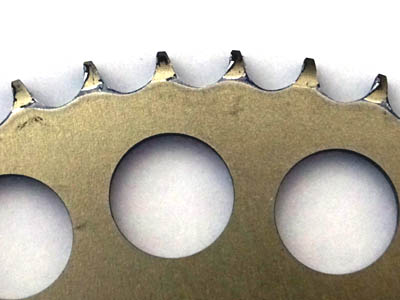
The image on the left is a photograph of the sprocket after traveling 28,000km. You can see that the sprockets are worn.
The rear sprocket was also worn.
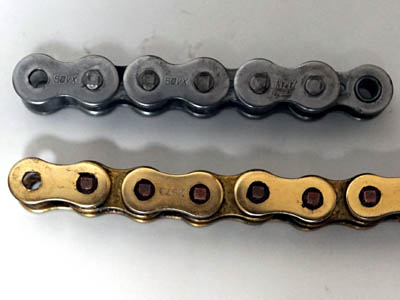
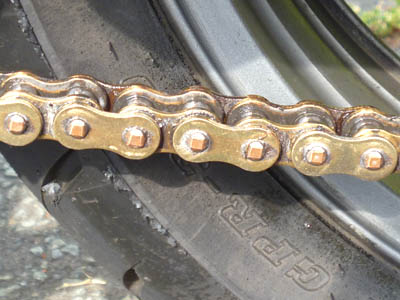
The photo on the left shows the chain after traveling 28,000km. The lower part is the old chain and the upper part is the scrap of the new chain. The lower chain is fully extended.
4. Tire pressure adjustment

A tire specification sticker is attached to the swing arm of the motorcycle. This sticker describes the standard tire pressure.
The standard air pressure for the ZZR400 is 225kPa for front tires and 250kPa for rear tires. Check the tire pressure regularly. In Japan, inflators are installed at gas stations.

There are several types of inflators installed at gas stations in Japan. There are three types of inflator that I often see in Tokyo.

This is the most standard inflator. If you set the air pressure with the dial, the air will automatically enter. The bell will stop sounding when the set air pressure is reached.
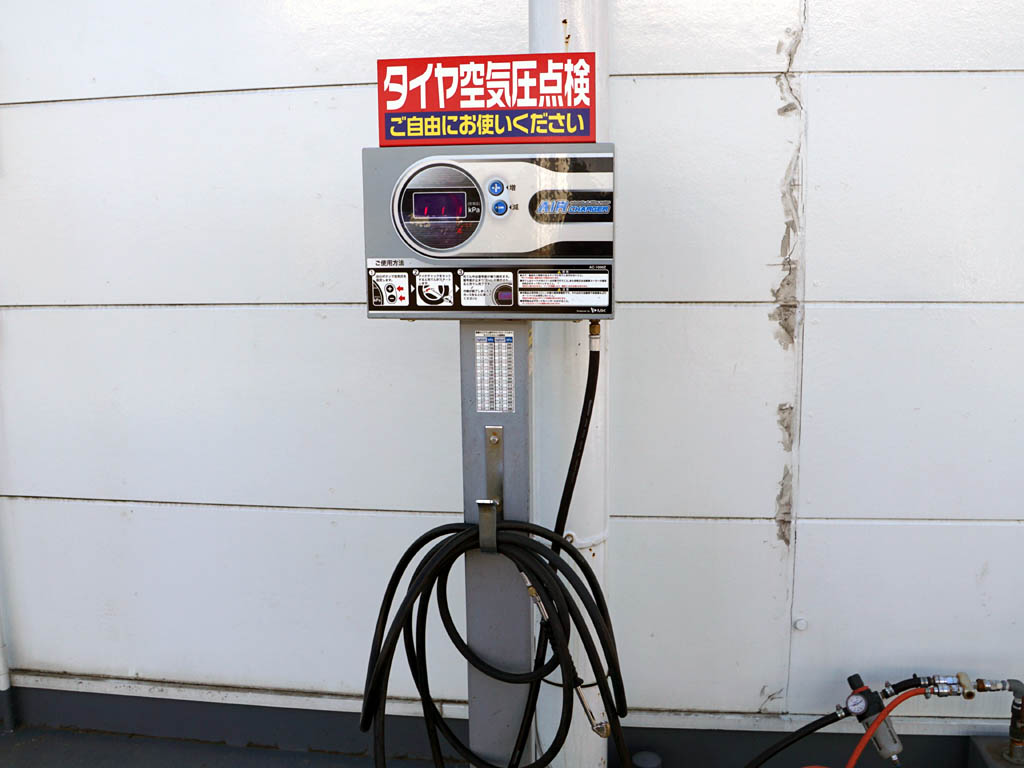
This is a digital inflator that I see a lot these days. Usage is almost the same as the previous inflator. From my personal opinion, there is a slight difference between the set air pressure and the actual air pressure in this pump. Therefore, I always check the air pressure using an air gauge.
This is the oldest compressor type inflator. It is a simple inflator. Most small gas stations have this inflator.
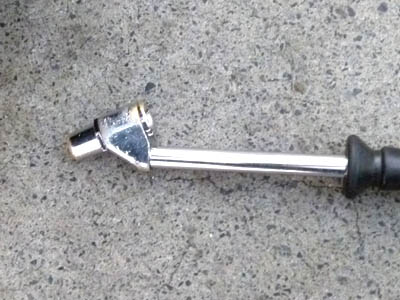
When inflating motorcycle tires at a Japanese gas station, the inflator nozzle may not be directly connectable.
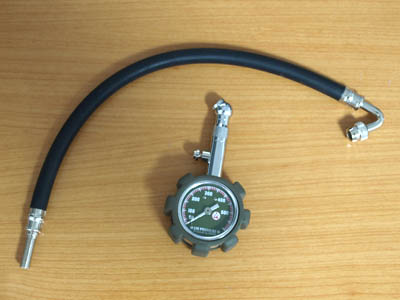
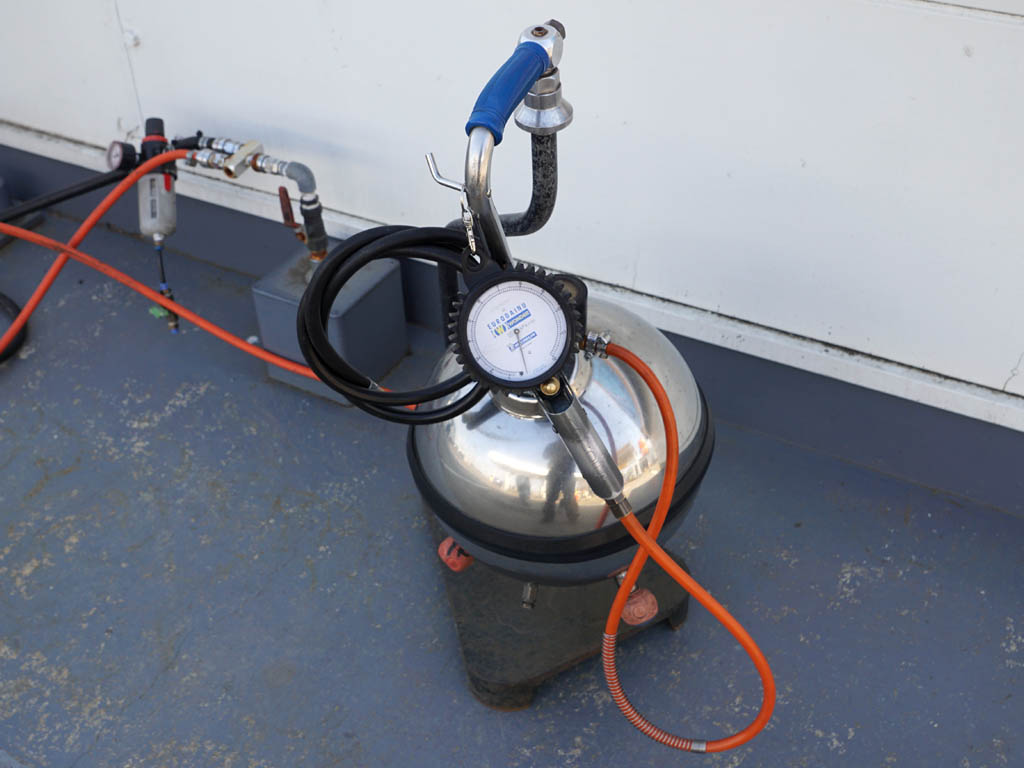
So I use an air gauge and an air charge hose. This tool is cheap and very convenient.
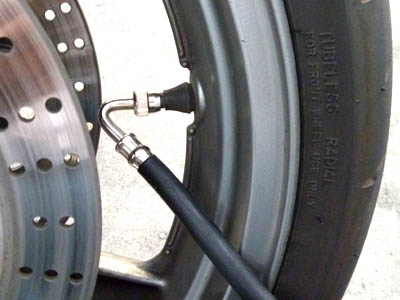
I have an air charge hose connected to the front tire of my motorcycle. This allows you to inflate motorcycle tires at gas stations.
5. Tire exchange
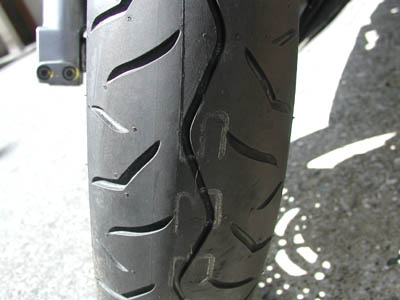
Tire replacement is also an important maintenance task. Replace the tires when you see the slip sign. Even if you can't see the slip sign, replace it if you think something is wrong. I have failed as a result of not replacing the tires because I still thought it would be fine.
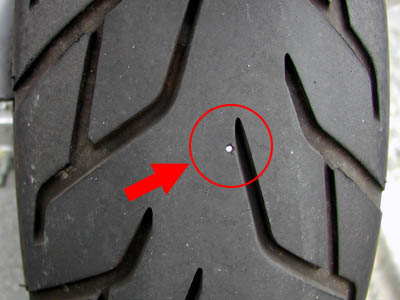
A nail may get stuck in the tire.I have experienced it twice. Check the surface of the tire frequently.
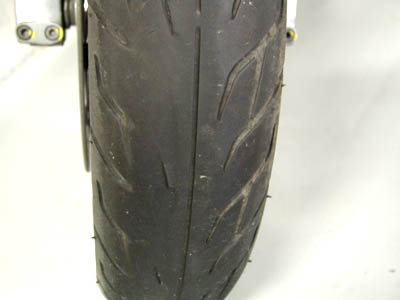
The picture on the left shows the front tire after running 10,700km. It is dangerous to ride a motorcycle in the rain in this state.
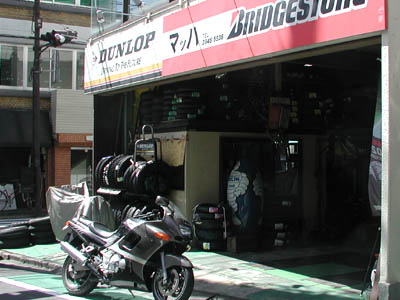
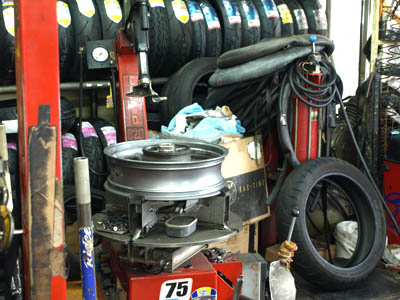
In Japan, there are motorcycle tire specialty stores. I recommend changing tires at a specialty store. Specialty stores have relatively low prices and relatively short wait times.
Shinjuku : Mach
Fuchu : Racing max
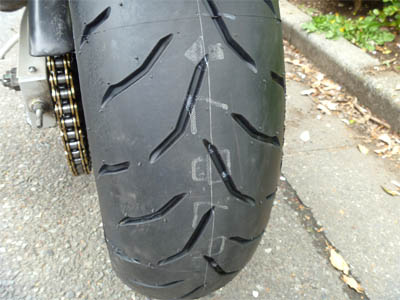
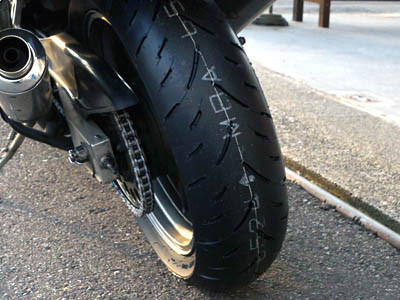
I have been using "DUNLOP SPORTMAX GPR" series since 2007. Initially, I used GPR-100 and GPR-200. The GPR-300 was launched in 2015. The photos are GPR-100 (2007), GPR-200 (2012) and GPR-300 (2015) in order from the left. GPR is a general touring tire.
6. Battery exchange
The batteries used in modern bikes are basically maintenance-free. If you ride your motorcycle regularly, your battery will last longer.
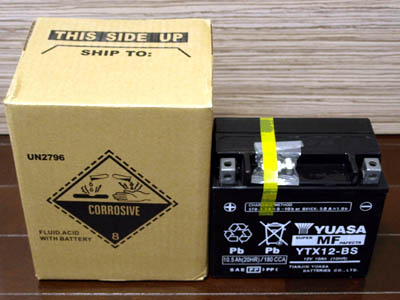
I use "YTX12-BS" made by YUASA. This is a common battery. You can purchase a battery that has been filled with battery fluid from Amazon.
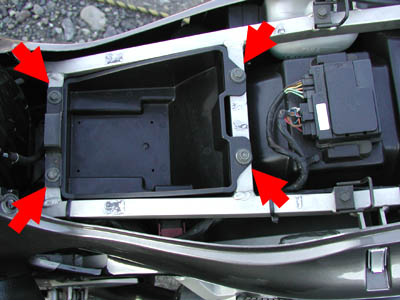
The ZZR400 battery is installed under the battery case. When replacing the battery, remove the seat and then remove the battery case. The battery case of ZZR400 is fixed with 4 bolts.
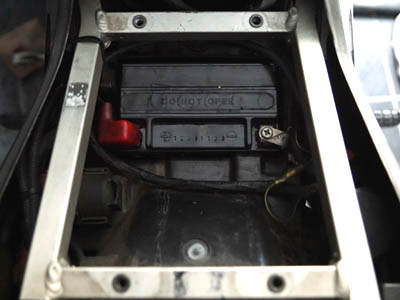
You can see the battery body by removing the battery case. When replacing the battery, be careful of short circuits. Old batteries you replace will be picked up by some stores for free.
ZZR400 has different battery types for N type and K type. You can check the battery type on the "GS-YUASA" website.
GS-YUASA : GS-YUASA
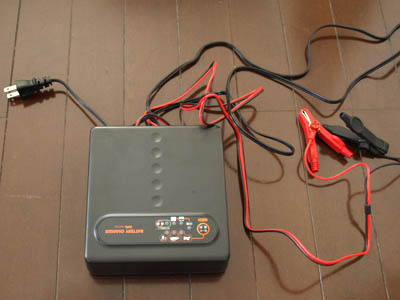
If you can't ride a motorcycle on a regular basis, we recommend a motorcycle battery charger. It is not an expensive product. However, some products cannot be charged from a fully discharged state.
7. Brake pads replacement
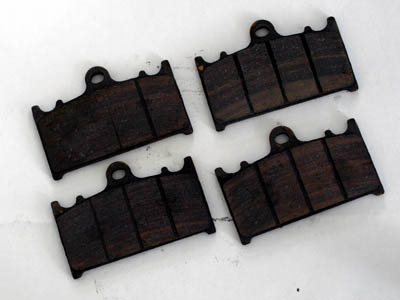
Brake pads are also an important part. Check it regularly and replace it if the thickness is gone.
It may be hard to see in the photo on the left, but of the four brake pads, only the upper left one is extremely worn. Brake pads are not evenly stressed, so some pads wear quickly and some wear slowly. Do not assume that it is okay to check just one brake pad. It is important to check all four.
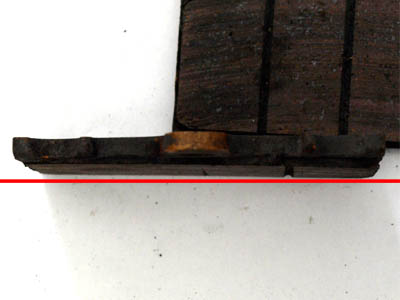
The picture on the left shows the pad being worn excessively and the lower plate is protruding. When the brake is applied in this state, the plate comes into contact with the disc rotor and abnormal noise is generated. Replace the brake pads before this happens.
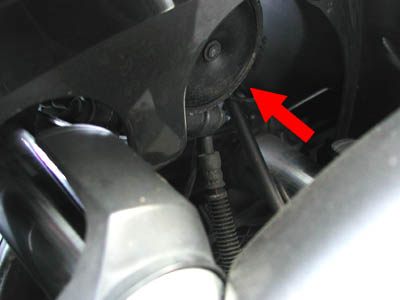
8. Radiator liquid
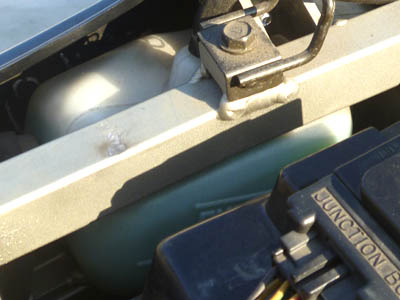
When the liquid level approaches the LOW line, add radiator liquid.
The radiator inlet for the ZZR400 is located in a narrow space. You can use a tool to replenish the liquid without removing the cowl. The replenisher is 400cc and costs about 700 yen. It is troublesome to replace it instead of adding it. It takes about 3 hours to request a replacement from a specialty store.
9. Cleaning the under cowl
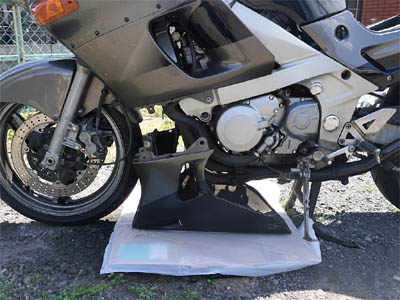
Inside the under cowl of a motorcycle, pebbles and debris that have bounced while riding can accumulate. The protective sponge attached to the inside of the cowl may also peel off due to aging. It can be cleaned to some extent even with the cowl attached. However, the cowl must be removed for a perfect cleaning.
10. Plug replacement

ZZR400 plug replacement is troublesome. If you do not want to replace it yourself, we recommend that you ask the shop to do the work at the time of vehicle inspection.
11. Vehicle inspection
When requesting maintenance from a specialty store, it is better to request it at the time of vehicle inspection. Especially for motorcycles with a cowl like the ZZR, there is no charge for removing and attaching the cowl. The vehicle inspection fee varies depending on the shop, but it is around 50,000 yen. Of course, if you replace the parts, the cost will be higher. Since there is no vehicle inspection for 250cc, let's perform maintenance regularly at a specialty store.
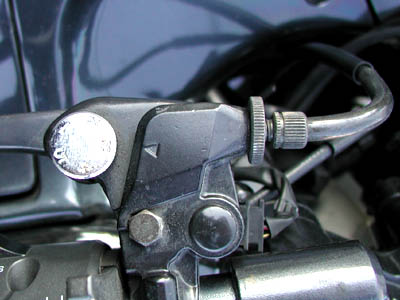
12. Clutch wire broken
From here on, I will talk about motorcycle troubles that I experienced.
One day, the clutch wire broke while running on a motorcycle. At this time, there was a sign that the wire was broken just before. The feel of the clutch lever suddenly changed. Motorcycles can put the gear low even if the clutch wire is broken. Therefore, you can reach the nearest store.
13. Carburetor stuck
One day, the engine suddenly stopped while riding on a motorcycle. After that, I pushed and carried my motorcycle to a store near. When the carburetor was disassembled and cleaned at the store, it was found that the nozzle was clogged. The cause was rust inside the fuel tank. Since the ZZR250 was an old motorcycle, it seems that the rust inside the fuel tank had peeled off and accumulated in the carburetor. To prevent a recurrence, I had a fuel filter attached between the fuel tank and the carburetor.
14. Thermostat failure
After running on a motorcycle in the summer, radiator fans may continue to run even if the engine is stopped. The thermostat controls this fan. The thermostat automatically shuts off the fan when the temperature drops. But one day, the thermostat broke and fans continued to spin. As a result, the battery was exhausted and the engine does not start. This is an example of a rare problem.
15. Damaged case assembly
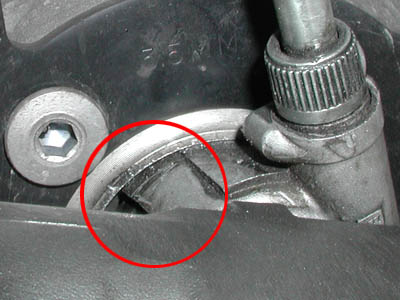
The case assembly of the front hub was damaged during Hokkaido touring. This is also a very rare problem. There is a meter screw inside the case assembly. Even if the case assembly is damaged, there is no problem in running, but if the meter screw not spin, the meters cannot be used. As a result, the speedometer, odometer and trip meter are no longer available.
16. Light cable break
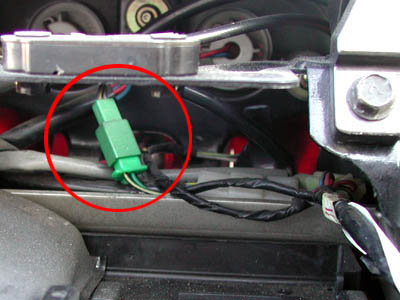
One day, I noticed that the blinker indicator light on the front panel was not blinking. This means a break in the light cable. When I checked the wiring under the seat, I found that it was caused by a sales clerk forgetting to connect the jack after maintenance.
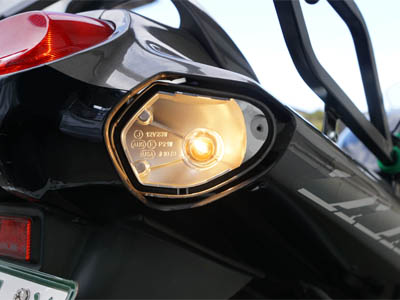
17. Light does not turn on (1) Valve replacement
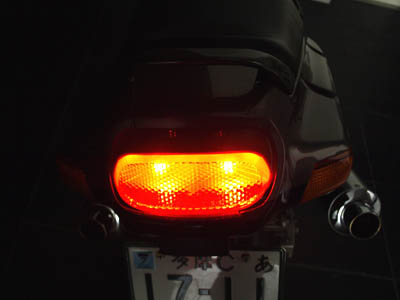
A common motorcycle tail lamp is a double filament. One is the brake light and the other is the constant light. The ZZR400 has two double filament bulbs. One day, both filaments on the constantly lit side were cut off. A general valve costs 240 yen, while a super vibration resistant valve costs 380 yen.
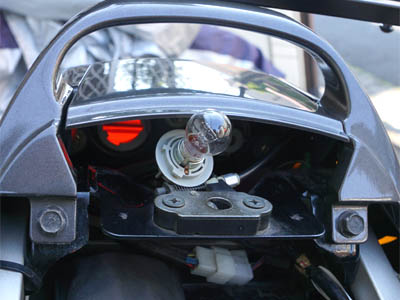
The ZZR400 tail lamp socket can be easily removed. It can be removed by rotating the socket a little.

A turn signal valve for the ZZR400 can be purchased for 250 yen each. The picture on the left is a turn signal valve of M&&H Matsushima 1P 3105 12V 23W.
The rear turn signal cover of the ZZR400 is a little hard to remove. Be careful not to break the claws on the cover when removing it.
18. Light does not turn on (2) Voltage regulator replacement
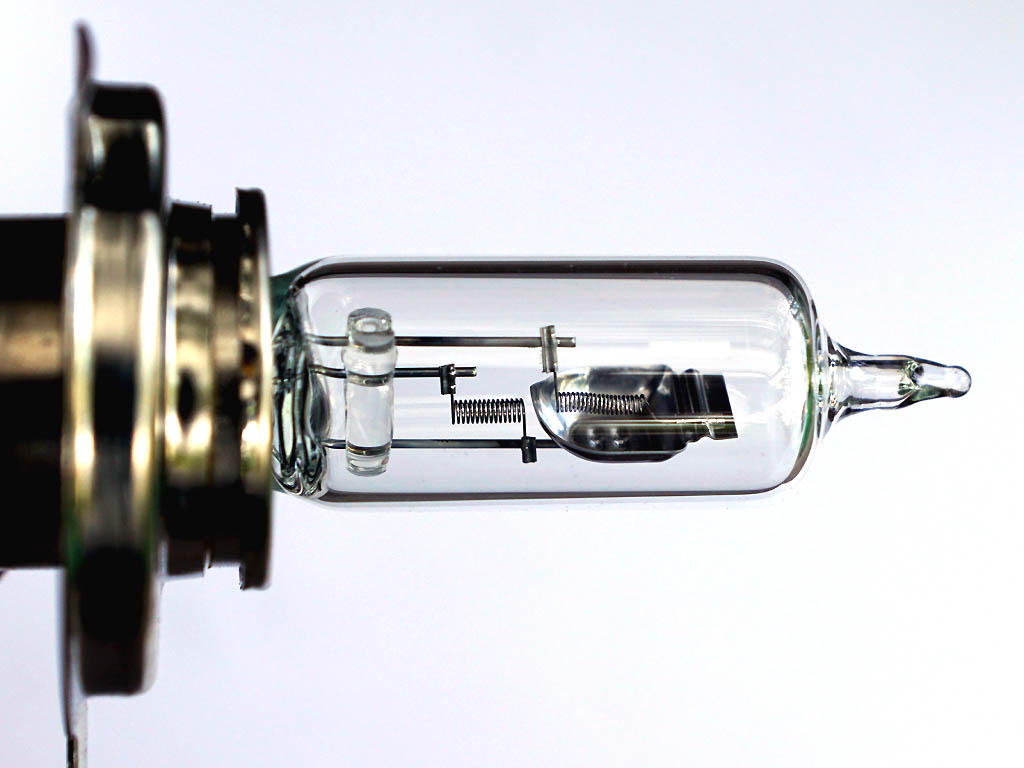
One day, the headlight didn't light up. There was no problem with the front light bulb. The fuse box is no problem. After all, the cause was unknown, so I asked the motorcycle shop to inspect it.
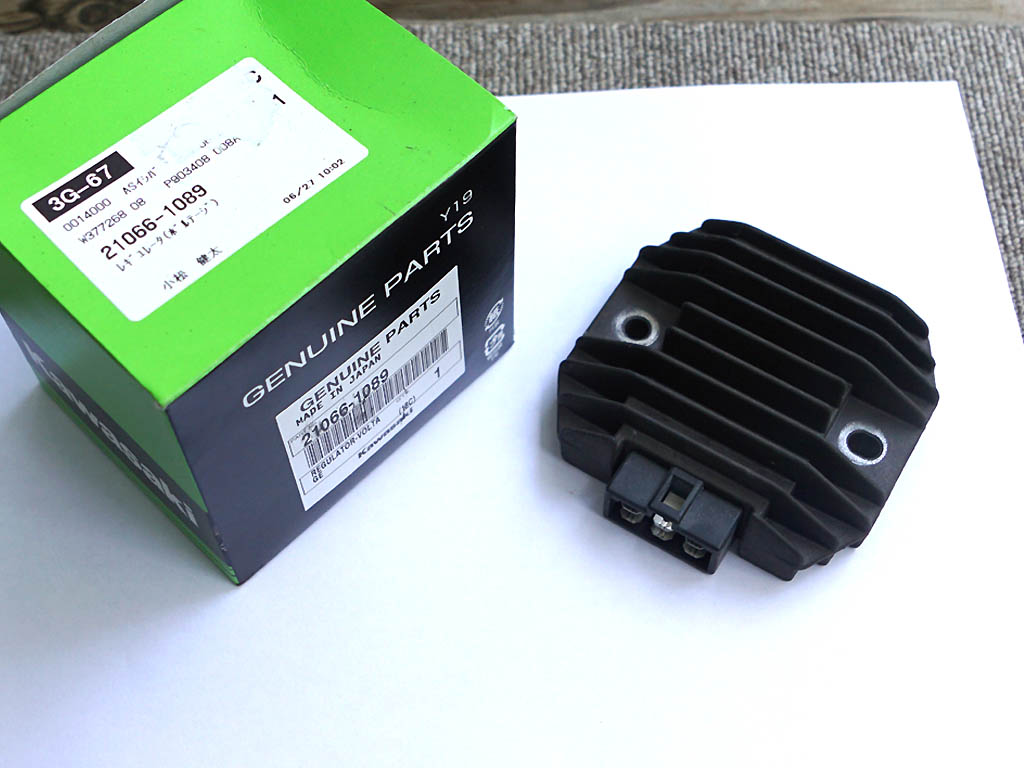
A clerk investigated and found that the voltage regulator was the cause. The voltage regulator has a built-in A/D converter and converts the electric power generated by the generator to flow. There are 6 terminals on the body, and there is a switch for the relay that turns on the front light here. When the engine is started and a certain voltage is supplied from the generator side, the switch for turning on the front light is turned on from here. This time, this part broke and the motorcycle front light went out. The voltage regulator for the ZZR400 was 11,600 yen.
19. Engine oil leak (1) Gasket replacement
Kawasaki motorcycles often leak oil. This is a fact that many Japanese riders know.
The initial oil leak was just a slight oil ooze. However, the amount of oil leaked out increased day by day. At the end, the leaked oil was collected inside the under cowl.
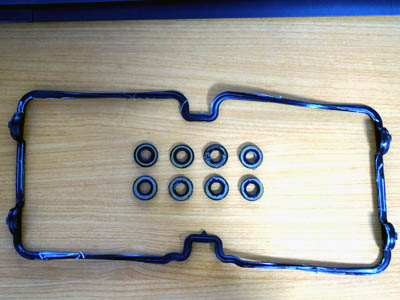
After all, it was solved by replacing the gasket. The picture on the left shows the old engine head gasket and head cover bolt ring that were replaced. The gasket is twisted and deformed. The rubber of the ring that is in contact with the cylinder head is worn out.
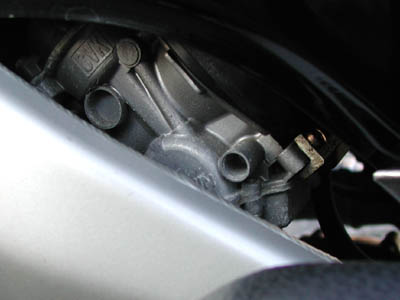
20. Engine oil leak (2) Water pump replacement
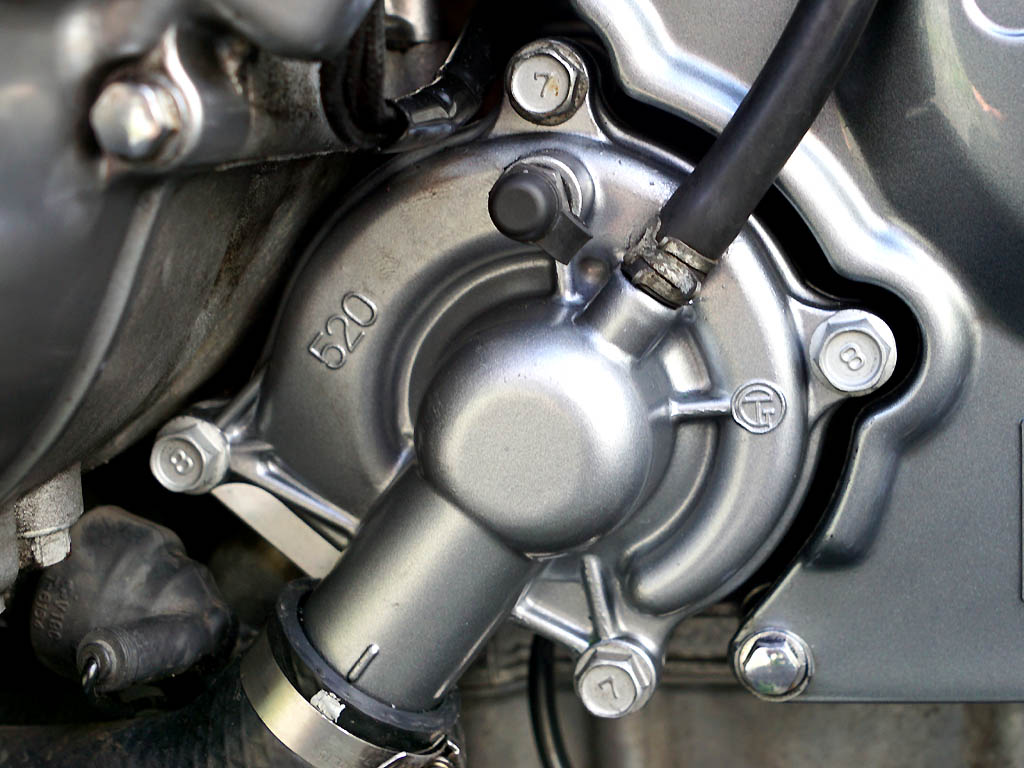
The oil leak has recurred. It was found that oil was leaking from the bottom of the water pump, so I replaced it. The water pump of ZZR400 was 13,800 yen.

This is the old water pump removed from the ZZR400. The water pump has two types of rings. The ring on the engine oil side was so loose that it came off easily. If oil leaks from here to the outside of the pump, it should stick to the sprockets. However, there was no oil leaking on the chain.
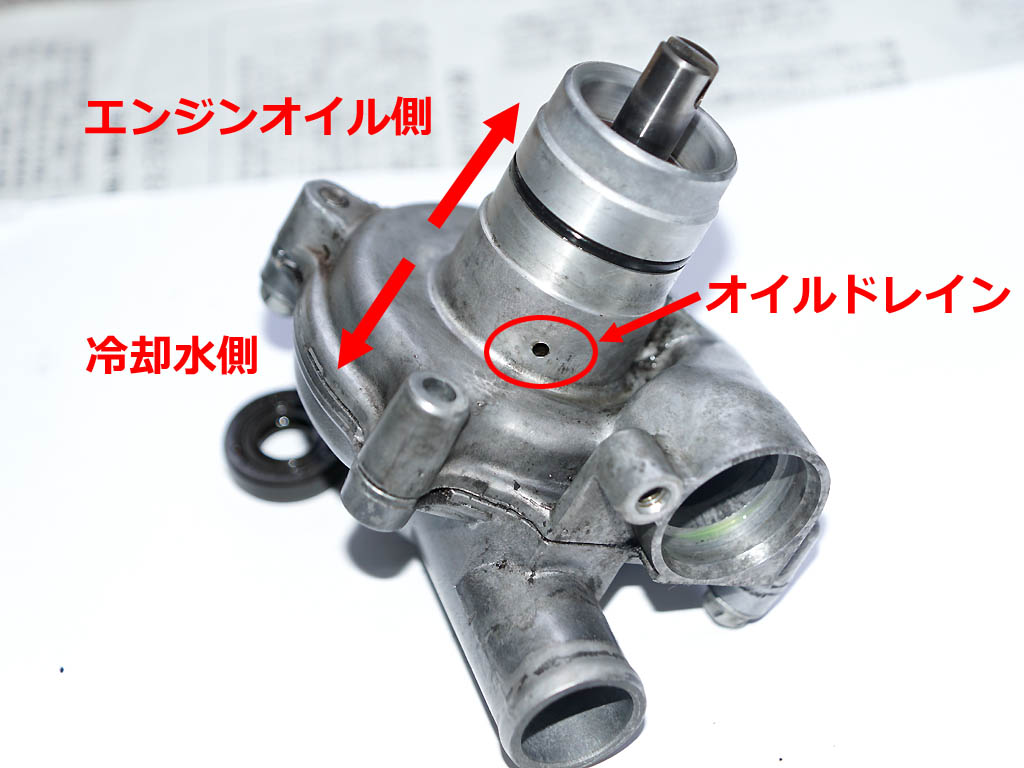
The water pump connection has a drain to prevent leaks engine oil from entering the coolant. It was discovered that engine oil has leaked from this drain.
21. Front fork oil leak
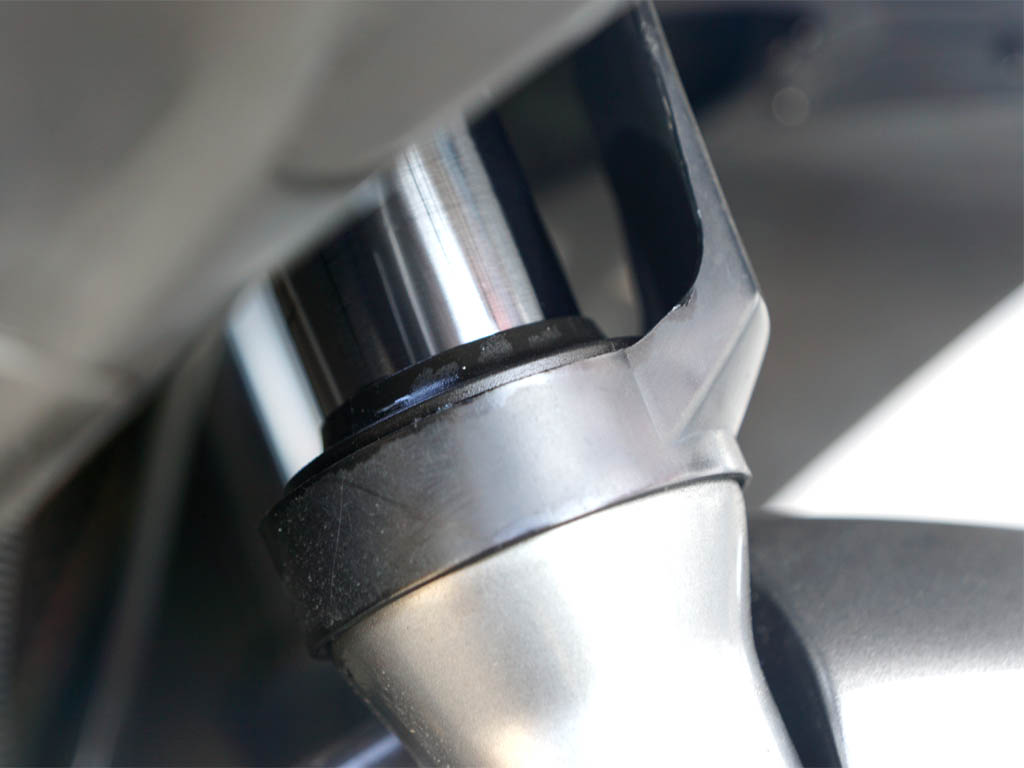
This time, the oil on the front fork leaked out. Leaving it can cause leaks oil to get on the front brake pads and discs. If the amount of oil that is leaking is small, it will be hard to notice.
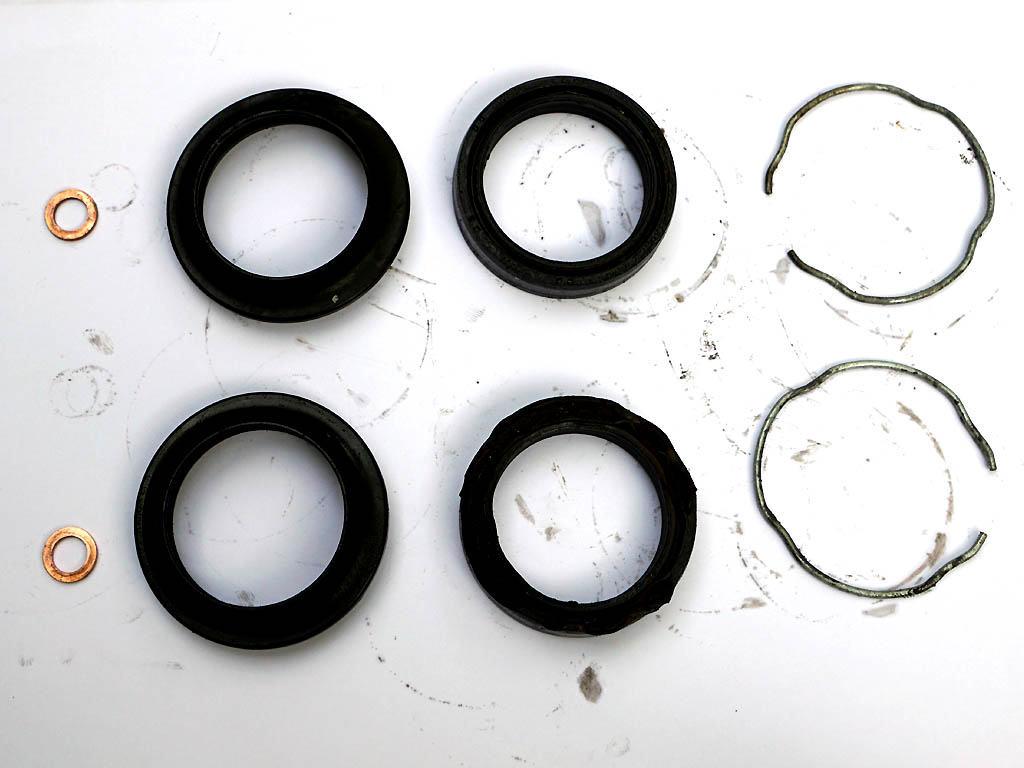
Here are the parts of the front fork I replaced. From left to right, drain gasket, fork seal, oil seal, and snap ring.
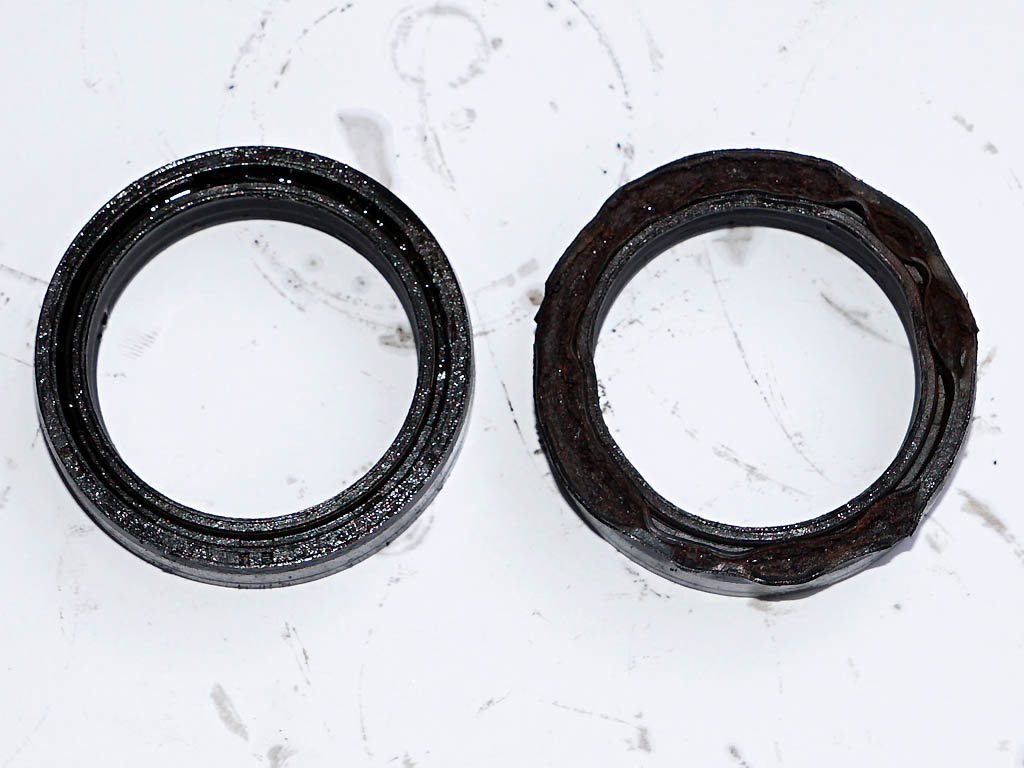
This is a deteriorated oil seal. The left is a normal seal and the right is a deteriorated seal that caused oil leakage.
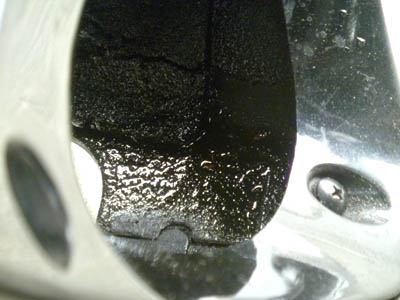
22. Emulsification of engine oil

Engine oil can emulsify in the cold winter. If the engine oil emulsifies, the inside of the oil window becomes cloudy and the amount of oil becomes difficult to see. Replace the emulsified engine oil as soon as possible.
23. Parts exchange
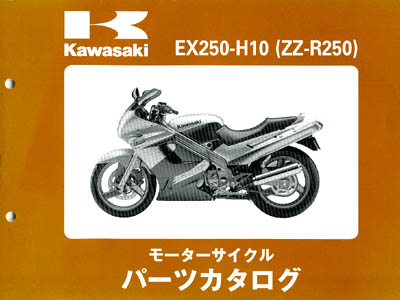
The last is a motorcycle parts catalog. Most motorcycle parts catalogs are available on the internet. This will tell you which parts you need to replace.